When it comes to turning enquiries into paid bookings on Dream Rides, your pricing setup matters more than you might think. Customers aren’t just choosing a car — they’re committing to an experience. And if your pricing is clear, structured, and easy to understand, they’re far more likely to move forward and lock it in.
The good news? You have full control over how your pricing works.
Inside your vehicle listing, you can choose between two pricing models:
- Standard Pricing – A single hourly rate with a minimum booking time that applies across your service area.
- Custom Pricing – A more flexible option that allows you to set different rates depending on the event type (wedding, formal, photoshoot, promo work, etc.) and the distance from your base location.
Both options work well — it simply depends on how you operate and how much flexibility you need.
In the sections below, we’ll walk you through exactly how each model works, when to use them, and how to apply Custom Pricing step-by-step so you can confidently set rates that reflect your time, travel, and the type of booking.
The goal? Less back-and-forth, clearer expectations, and more confirmed bookings.

The Simple Option: set hourly rate & minimum booking time
Standard pricing is the most straightforward way to charge for your vehicle. You set one base hourly rate and a minimum booking time for all events within your nominated service area.

This option is ideal if:
- You mostly operate in one location
- You want to keep things simple
- Your events don’t vary much in time or complexity
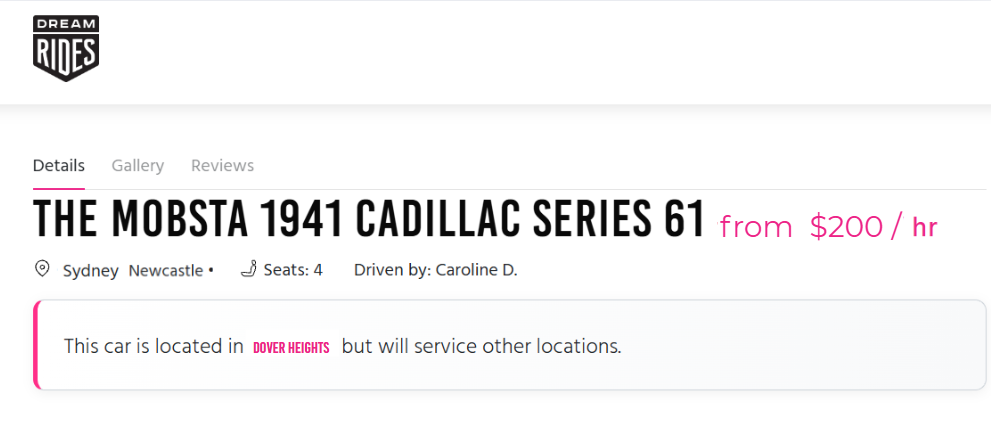
When you use Standard Pricing, customers browsing your vehicle will immediately see your base hourly rate displayed on your listing. This helps them quickly decide whether your ride fits within their budget before they even send an enquiry. It’s simple, transparent, and very easy to manage — especially if you’re new to the platform or mainly operate locally.
Setting Your Standard Pricing (Required for All Vehicles)
Every vehicle listed on Dream Rides must have Standard Pricing set up first — even if you plan to use Custom Pricing.
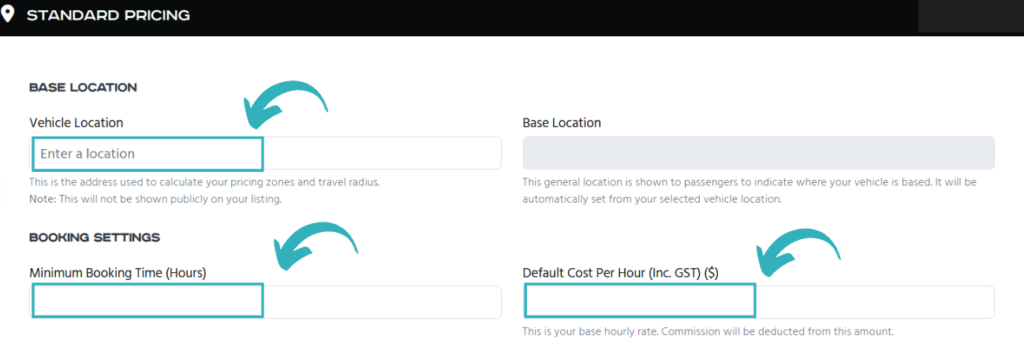
This is your foundation pricing, and it includes three key things:
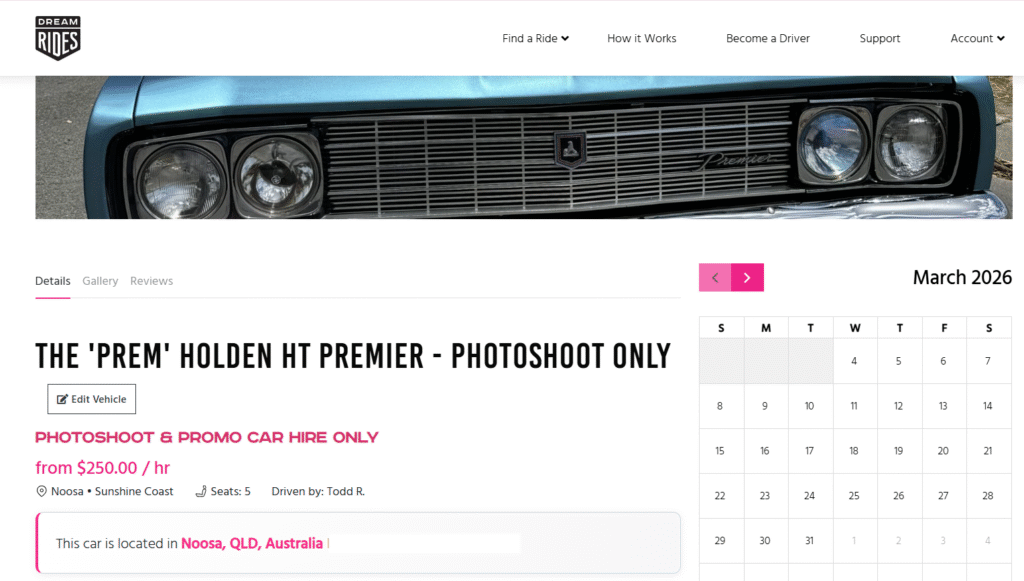
- Your Base Location – This is where your vehicle is primarily located and operates from- this will display on your vehicle listing
- Your Minimum Booking Time – The minimum number of hours a customer must book.
- Your Hourly Rate – The fixed hourly rate that applies based on that minimum booking time.
To set this up:
- Enter your main operating suburb as your base location.
- Decide the shortest booking you’re willing to accept (for example, 2 hours).
- Set your hourly rate for that time commitment.
This standard rate will appear on your vehicle listing and acts as your default pricing. Even if you later apply Custom Pricing for different event types or locations, your Standard Pricing needs to be applied.
Think of it as your baseline — everything else builds from there.
Customers browsing your ride will see this base rate on your vehicle listing, which helps them gauge affordability before they make an enquiry. It’s clear, simple, and easy to manage — especially if you’re just starting out.
This is important because customers often search by location, and the first area you list will have the strongest visibility in search results. Getting this order right can make it easier for the right customers to find you — and help you convert more enquiries into confirmed bookings.
💡 Side Note: You can always adjust the price on any enquiry that’s awaiting your approval (this does not apply to Instant Book).
Use the “Adjust” feature to increase or decrease the total, then include a quick note explaining the change. This makes it easy to handle extra time, travel, or special requests — or to offer a discount — while keeping everything transparent for the customer.
But what if a customer wants to book your vehicle for a wedding 80km away, or a half-day photoshoot in another region? That’s where custom pricing becomes your best tool.

Custom Pricing: More Clarity, More Flexibility, More Bookings
Custom Pricing is a powerful way to turn Dream Rides enquiries into confirmed, paid bookings. It allows you to provide transparent, event-specific pricing that accurately reflects your time, effort, and travel — so customers know exactly what to expect, with no surprises.
Here’s why it works: many customers may be watching a vehicle for weeks before enquiring. By the time they reach out, they’re emotionally invested and ready to book. Custom Pricing lets you provide a clear, tailored quote upfront, making it easy for them to commit and pay with confidence.
How Custom Pricing Works
With Custom Pricing, you can:
- Set different rates for different event types – weddings, school formals, photoshoots, promotional work, or other special events can each have their own hourly rate.
- Use distance-based pricing – charge different rates depending on how far the booking is from your base location.
- Offer flexible durations for photoshoots or creative bookings – choose Half Day (4 hours) or Full Day (8 hours) options.
- Set minimum booking times – maintain control over how your time is valued.
Once you set your Custom Pricing, every new enquiry will automatically come in with the right pricing context, making it easier for customers to say “Yes, I want to book!”
Overview of Custom Pricing: How This Works
Custom Pricing lets you create clear, event-specific rates so customers know exactly what they’ll pay — and you’re fairly compensated for your time, effort, and travel. Here’s the quick breakdown:
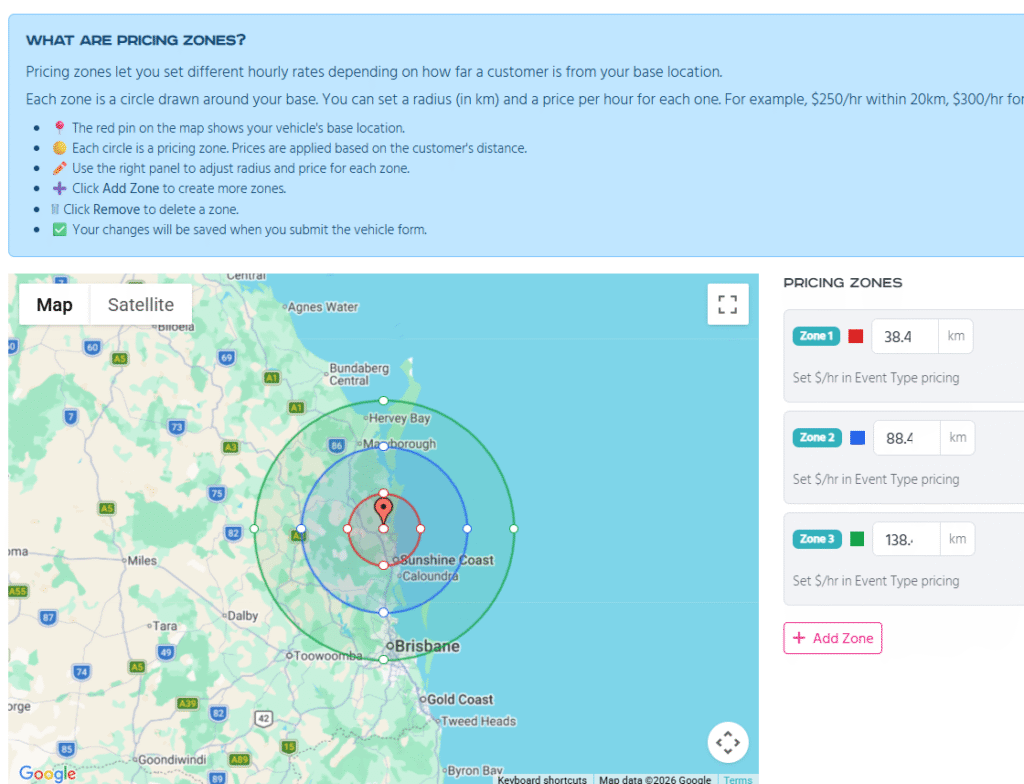
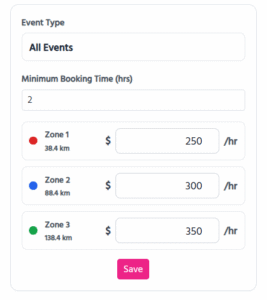
- Define pricing zones once using a single shared map.
- Set different minimum booking hours and hourly rates for each event type.
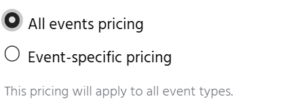
- All Events option: If you select “All Events,” event-specific pricing is disabled and one rate applies across the board.
If you haven’t set up custom pricing yet:
Your default Standard Pricing will apply until you configure Custom Pricing.
Here’s how to set it up:
Step 1: Pricing Mode
Select “Set Up Custom Pricing.” Choose your pricing mode:
Step 2:
![]()
Open the map tool to set zone distances. Use the drag handle at the edge of each zone to adjust its size and position exactly how you want, so each distance zone matches your preferred coverage area.
Step 3: Manage Event Pricing
Shared Pricing Zones
Edit zone radii once. Rates are set per event in the table below.

Don’t Forget Your Service Areas
Alongside choosing the right pricing model, it’s just as important to set up your Service Areas correctly. In the Vehicle Details section, always list your main or primary area first, followed by any additional areas.

Why? Because the order of your service areas directly impacts how customers find you. If your primary location isn’t at the top, you could be missing out on visibility — and fewer people will see your ride at the right price in the right place.
By combining a clear pricing strategy with well-ordered service areas, you make it easy for customers to understand what you offer, where you operate, and why they should book with you. That clarity builds confidence — and ultimately helps you turn more enquiries into confirmed bookings.
Why Custom Pricing Benefits You as a Driver or Fleet Owner
Taking the time to configure your custom pricing may seem like extra work upfront — but it pays off with less admin and more conversions down the track.
Here’s what you gain:
- Higher conversion rates: Customers who know what to expect are more likely to proceed to payment.
- Clarity across distance: Set transparent pricing for bookings outside your local area.
- Event-specific flexibility: Price differently for complex jobs (like weddings) versus simpler ones (like formals).
- Saves time for fleets: If you manage multiple vehicles, custom pricing makes coordination easier.
- Reach customers further away: Dream Rides is about unique experiences. If your vehicle is someone’s dream ride, they may travel — or pay for you to.
How the Customer Experiences It
Customers browsing your vehicle listing will see your base location, and the pricing they’re shown will automatically reflect the event type and distance — based on the parameters you’ve set when creating your listing. This level of clarity helps build trust and ensures customers understand the value of your service, making them more confident and comfortable when it’s time to confirm the booking.
🕒 Handling Getaways and Split Bookings
Sometimes customers request special timing for their booking — like a late-night getaway after a wedding, or splitting their booking across different parts of the day. Dream Rides gives you the flexibility to handle these requests while ensuring you’re compensated fairly.
Here’s how to manage it:
Step 1: Review the Enquiry
- Open the booking that’s awaiting your approval.
- Check the enquiry notes for any special requests. Examples might include:
- “Can we do the photos earlier, then have you return for a getaway pickup at 11 PM?”
- “We’d like a late-night getaway ride added after the main event.”
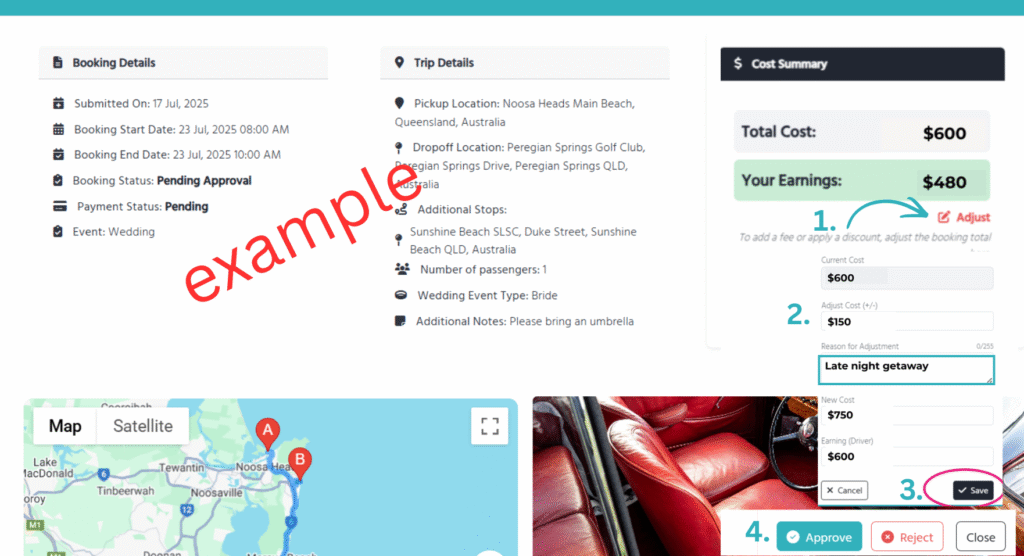
Step 2: Adjust the Price
- Click “Adjust” in the booking details.
- Add any extra fees for additional time, distance, or late-night pickups.
- Or, if you want to offer a discount, use the minus symbol (-) to reduce the total.
Step 3: Include a Note
- Always add a quick explanation so the customer knows why the price was adjusted (e.g., “Added late-night pickup fee”).
Step 4: Save and Approve
- Click “Save” to update the booking.
- When you approve the enquiry, the customer will see the adjusted total and can choose to:
- Accept the new price and pay, or
- Cancel the enquiry if it doesn’t work for them.
Tip: This flexibility helps you say “yes” to unique requests, manage your time effectively, and ensure customers understand the value of your service.
💸 Offering Discounts or Adjusted Rates
Dream Rides also lets you reduce your booking price when needed — perfect for short jobs, multiple vehicles, or a reduction in hourly rate after a certain time period has lasped. Here’s how to do it clearly and efficiently:
Step 1: Open the Enquiry
- Go to the booking awaiting your approval (this does not apply to Instant Book).
- Review the booking details and decide if a discount or adjusted rate is appropriate.
Step 2: Use the Adjust Feature
- Click “Adjust” in the booking options.
- In the fee section, enter a negative amount using the minus symbol (-) to reduce the total.
Examples:- Reduce the hourly rate after the first 3 hours.
- Apply a discount for short-distance jobs.
- Offer a special rate for customers booking multiple vehicles.
Step 3: Add a Quick Note
- Include a brief explanation so the customer knows why the price was adjusted (e.g., “Discount applied for multi-hour booking”).
Step 4: Save and Approve
- Click “Save” to update the booking.
- Approve the enquiry so the customer can see the new total and complete their payment.
Tip: Transparent adjustments help build trust with your customers and can increase the chances they pay and confirm the booking. Small gestures like this often encourage them to proceed to payment.
📸 Custom Pricing for Photoshoots and Promo Work
If your car is often used for photoshoots, film work, or promotional content, Custom Pricing makes it easy to set rates that match the unique structure of these jobs. Here’s how to set it up so both you and your customer are clear on pricing:
Step 1: Open Custom Pricing Settings
- Go to your vehicle listing and click “Edit Listing.”
- Select “Set Up Custom Pricing” if you haven’t already.
- Choose “Event-Specific Pricing” for photoshoots or promotional work.
Step 2: Set Duration Options
- Decide which durations you want to offer:
- Hourly – for shorter shoots or last-minute requests.
- Half Day (4 hours) – perfect for most photoshoots.
- Full Day (8 hours) – ideal for larger productions or multi-location shoots.
Step 3: Assign Rates for Each Duration
- Enter your hourly rate for shorter jobs.
- For Half-Day or Full-Day bookings, set flat rates that fairly reflect your time, travel, and effort.
- Consider including any additional fees for travel outside your base location.
Step 4: Save Your Settings
- Double-check your rates and durations.
- Click “Save” so every new enquiry will automatically display the correct pricing for photoshoots or promo work.
Tip: Clear, upfront pricing is especially appreciated by professional clients like photographers, film crews, and brand campaigns. They plan ahead and want to know exactly what their budget will cover — this makes them more likely to book quickly.


⚡Combine Custom Pricing with Instant Book
Once your Custom Pricing is set and your calendar is up to date, you can take things even further with Instant Book. This feature allows customers to book and pay instantly, without waiting for you to manually approve each enquiry. It’s perfect for drivers and fleet owners who want to save time and maximise bookings.
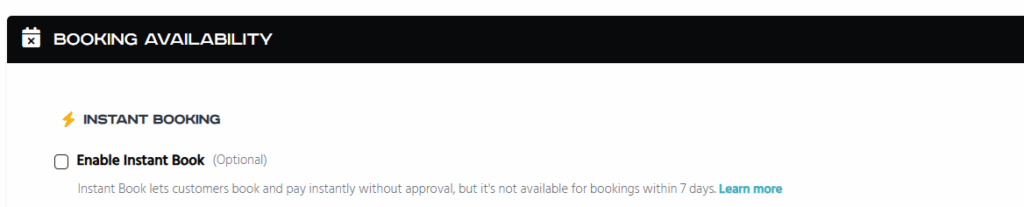
Step 1: Enable Instant Book
- Go to your dashboard and scroll down till you find your ‘Vehicle Listing‘ and select “Edit.”
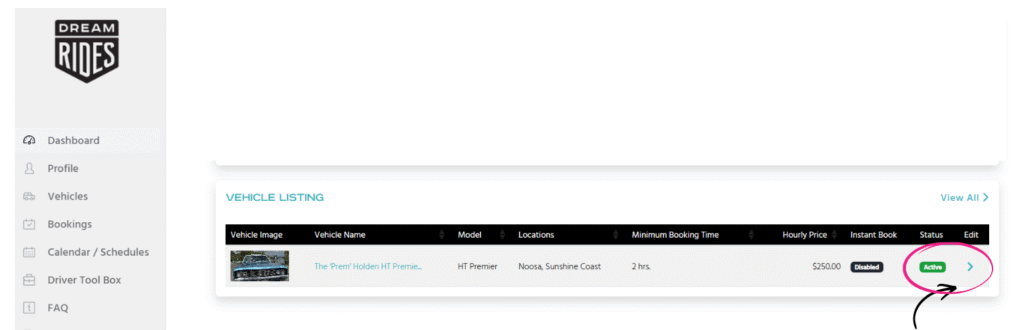
- In the ‘Booking Section‘ Turn on Instant Book.
- Confirm that your calendar availability is correct — only dates you’ve marked as available can be booked instantly.
Step 2: Check Custom Pricing Compatibility
- Instant Book will use your Custom Pricing rates automatically.
- Make sure all event-specific rates and distance-based zones are correctly set, so the right price is applied without manual adjustments.
Step 3: Review Minimum Booking Requirements
- Instant Book stays with in your minimum booking times for each event type.
👉 Click here to learn more about Instant Book.
Final Thoughts: Pricing Is a Powerful Conversion Tool
Your pricing isn’t just a number — it’s a signal of value, professionalism, and trust. Whether you’re running a one-car side hustle or managing a fleet of dream machines, custom pricing gives you the flexibility, clarity, and control to turn more enquiries into paid, confirmed bookings.
Ready to take your listings to the next level?
→ Log in now and update your pricing settings
You can update your pricing when creating or editing your vehicle listing — changes can be made at any time.
Need support?
Look out for helpful links and prompts during the vehicle setup process. These will guide you step-by-step through setting up standard or custom pricing options to help you get the most from every ride.
Need help pricing your ride?
If you’d like a step-by-step breakdown on how to find that perfect balance between value for customers and fair reward for you, check out our full guide: A Driver’s Guide to Setting the Perfect Rate